Open Photoshop and click File and Open. Then navigate to the folder where you saved your file and open it.
Once you've opened your photograph file, navigate to the Layers panel on the right side of the workspace and right click the background layer. Choose Layer from Background and, if desired, enter a name for the layer when prompted.
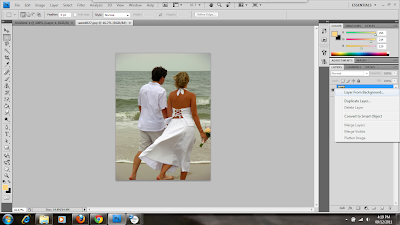
Next, you want to create a new fill layer. Navigate to the bottom of the Layers panel and click the middle icon; it looks like a circle that's half black and half white. You can choose any background you want, whether it's a gradient, a solid color, or a pattern. In this demonstration, we're going to choose a solid color.
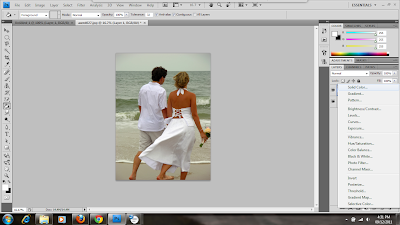
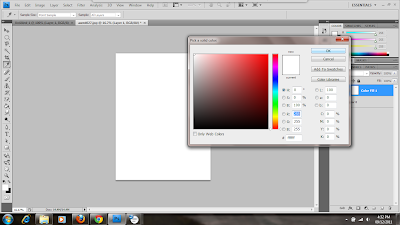
The layer will be created and the color picker dialogue box will automatically pop up. Choose the color you want the background of your picture to be. In this case, I've chosen white (to start).
Now, make sure your new fill layer is still active and then select the elliptical marquee tool. It may be underneath the rectangular marquee tool, in which case you should click on the black arrow in the corner of the tool button to pull up the list of options. If you want your selection to have a soft, faded out effect, then change the Feather option along the top bar. I've chosen to feather my edges by 50 px to give it a gradual, soft fading out. Drag a selection marquee around the area that you want to be visible.
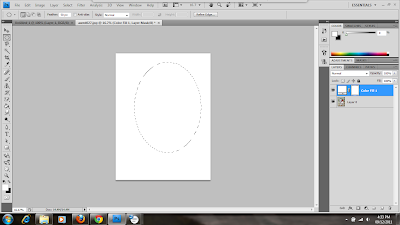
Now we want the picture to be visible through the selected area, so we click Edit and then Fill.
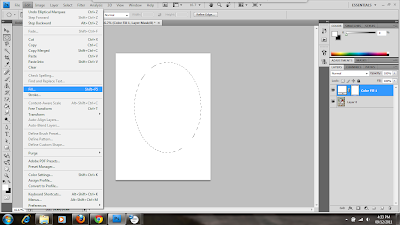
Since the layer color is white, you want to choose the opposite of that so the selection will be visible. In the color drop down box, choose black and then click OK.
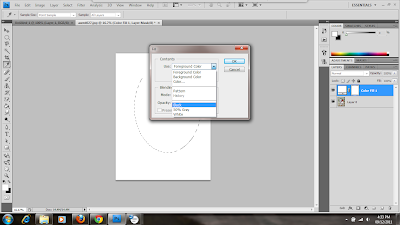
Your selection should appear. At this point, you want to deselect the image, so click Select then Deselect.
Here, I should mention that if you change your mind about the background color, you can always change it by double clicking on the first thumbnail of your fill layer. You can choose a color from the color picker and it will automatically replace the old one. I decided I wanted a different color that blended in a little more, so I used the color picker and the eyedropper tool to select a color from the man's shirt to use for the background.
Now let's do some cropping to get rid of the extra space. You always want to leave some space to frame the image, but too much will make it look off balance and isolated. Select the crop tool from the Tools panel and drag the box around the area you want to keep. Then hit Enter.
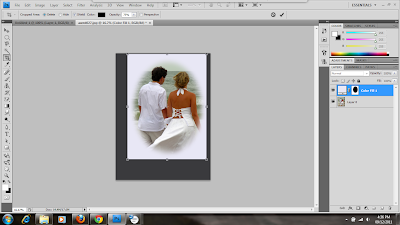
Your picture is ready to save now. You can save it in any format you want, but it's best to save it in a format that's suitable for the web. To do this, click on File then Save for Web & Devices.
When the dialogue box pops up, select the options that suite you. I have chosen to save it as a JPEG since it's a photograph. Once you're done setting options, click Save and give it a name, then navigate to the folder where you want to save it.
Creating vignettes is a simple, easy way of emphasizing a focal point of your pictures or making them look more professional.
About CODANK Web Design
CODANK is a top rated Web Design and Internet Marketing firm located in Charlotte, NC. We are dedicated to providing the highest quality, cost effective custom software development services, delivering a broad range of business consulting and outsourcing services.
For more information, visit us at www.codank.com

Firstly you should get a trusted web page design with Worcester organization.charlotte web development
ReplyDelete